Document: 19-0205
STEP
INSTALLATION INSTRUCTIONS
FUEL FILTER/FPR KIT
2001-2006 BMW E46 M3
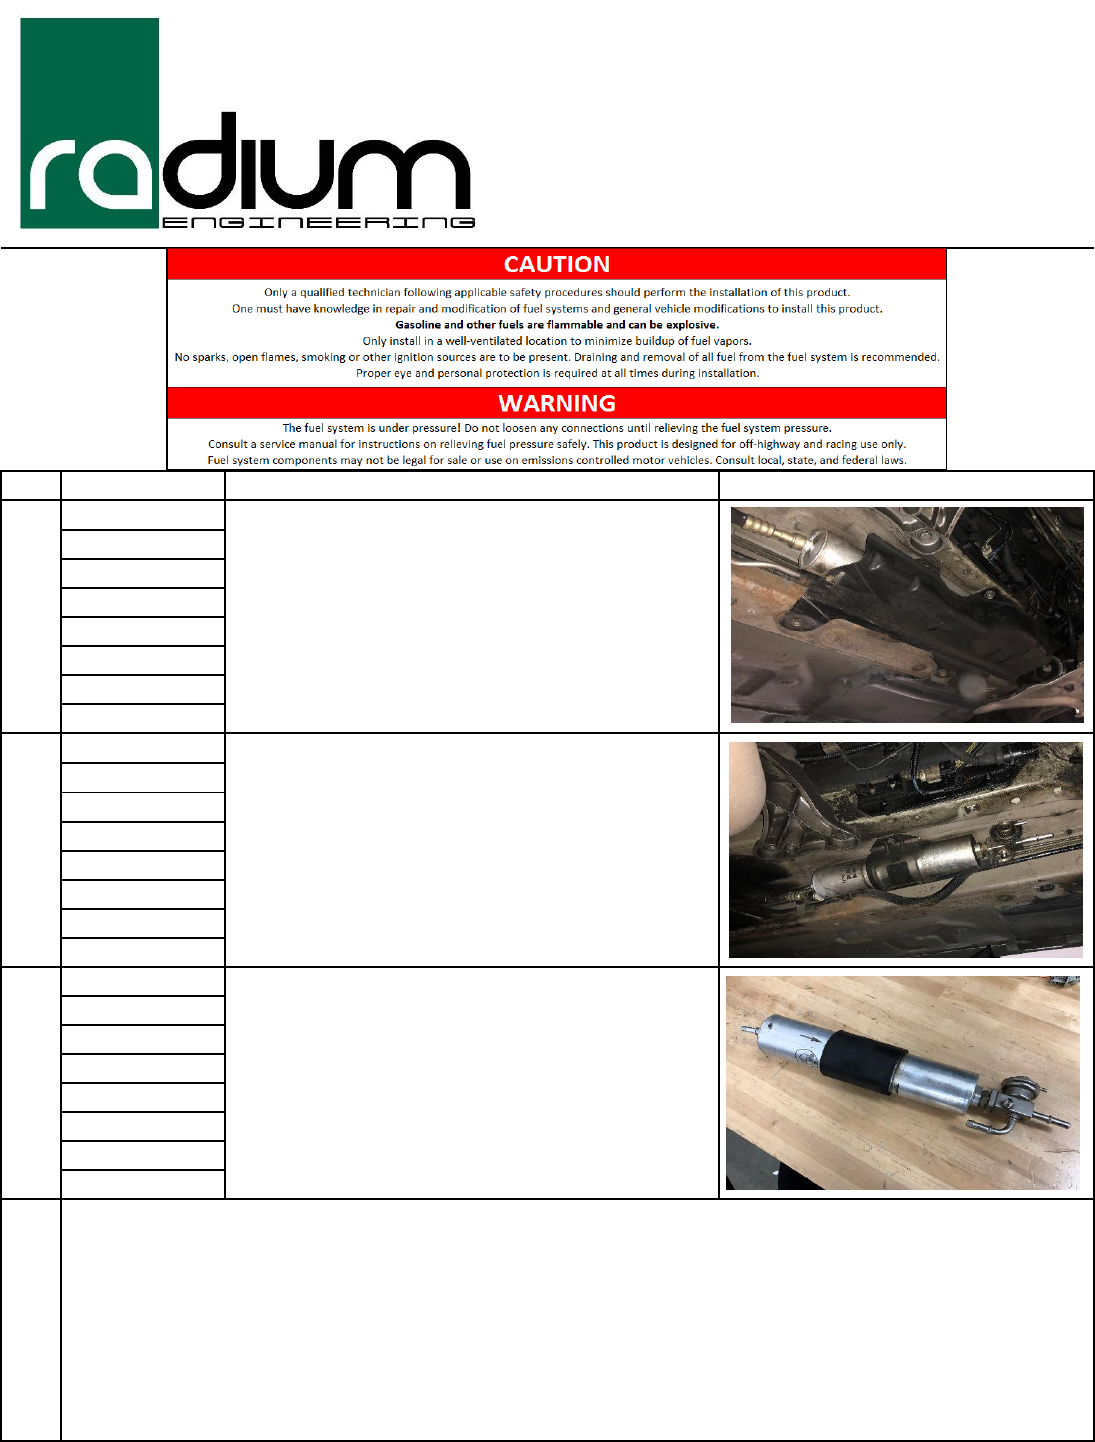
Raise and safely support the vehicle. Remove the metal cover from the
area of the fuel filter.
INSTRUCTIONS
PHOTO
TOOLS NEEDED
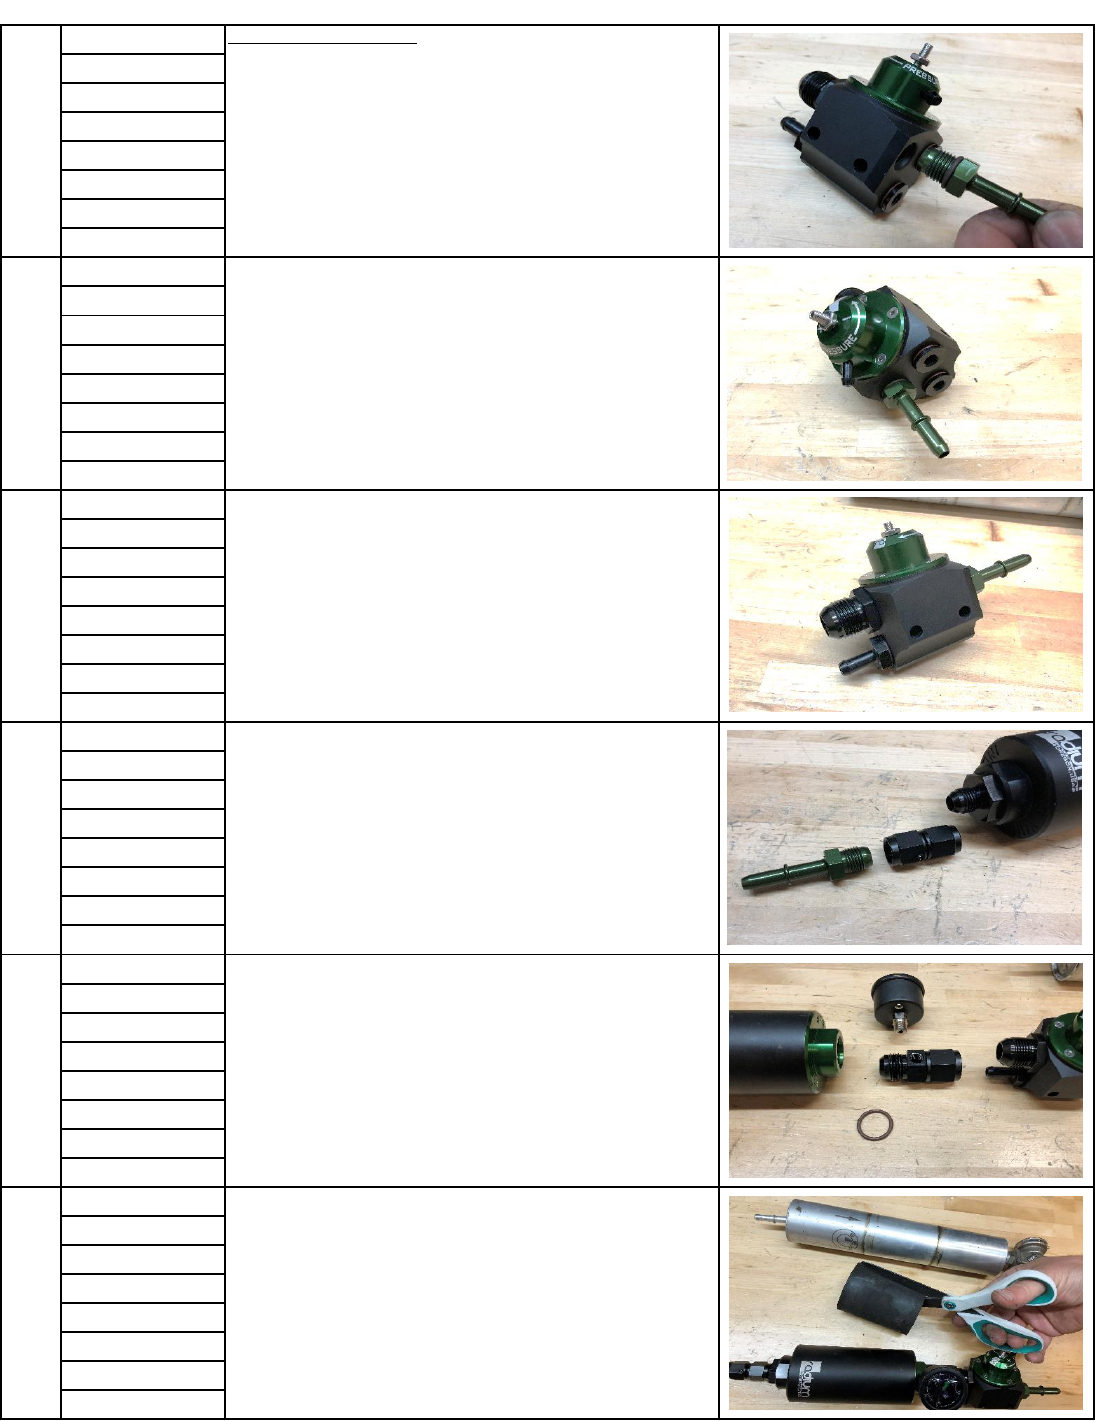
Disconnect the vacuum line from the fuel pressure regulator (FPR).
To relieve fuel pressure, access the Schrader valve on the FPR just in the
front of the fuel filter. Remove the metal cap and surround the valve with a
towel. Use a small screwdriver or other tool to press the center of the
valve. Have a rag handy as fuel will release under pressure.
Once pressure is relieved, disconnect the fuel lines from the inlet of the
filter and the outlet of the regulator. This is done by pressing the plastic
retainers into the hoses and then pulling off the fittings.
Insert-picture-browse to picture
Make 1.53" tall
1
2
Rag
8MM Socket
10MM Socket
3
10MM Socket
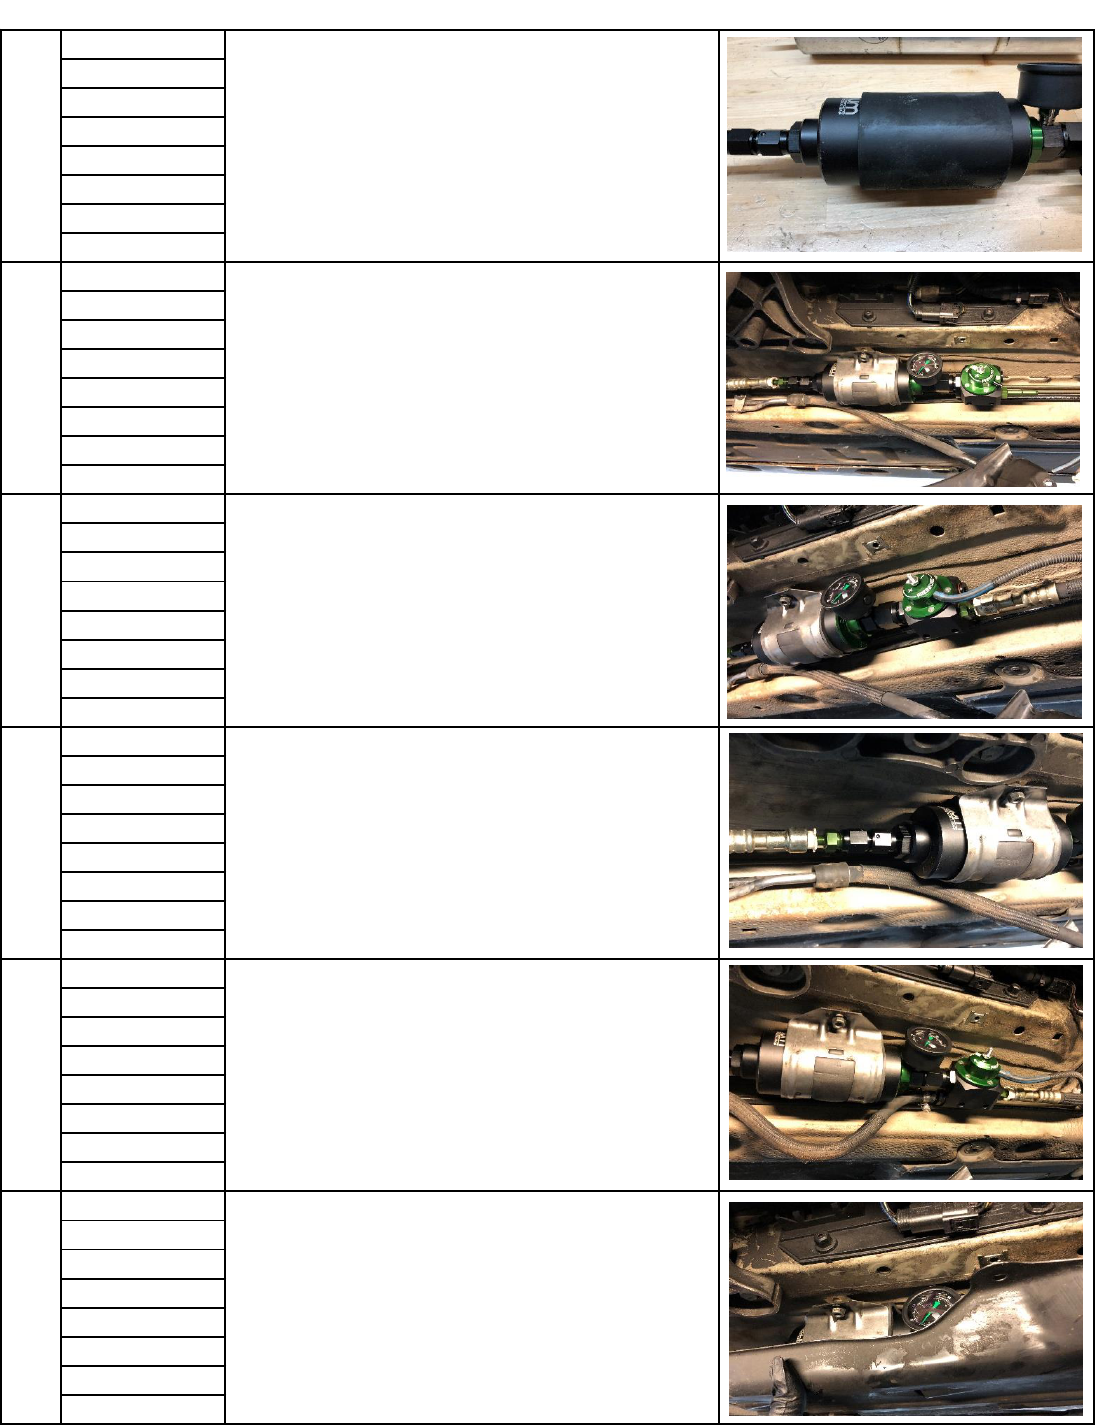
Remove the nut holding the fuel filter bracket in place and remove the fuel
filter/FPR assembly from the vehicle.
Follow steps 4-16 for P/N: 20-0430
Follow steps 17-22 for P/N: 20-0429
Support: info@radiumauto.com
5
5/64 Allen wrench
4
Oil Lubrication
P/N: 20-0430 INSTALLATION
NOTE: There are 2 provided orifices. Preinstalled is the smaller silver orifice
and is generally best for most applications. For very high flow pump(s), the
gold orifice can be installed if minimum base static fuel pressure cannot be
achieved. See the MPR instructions for more details.
Find one of the green SAE adapter fittings in the kit and install the smaller
brown o-ring onto the 6AN male side. Screw the 6AN male fitting into the
port shown on the Radium FPR. All o-rings should be lubricated with oil
prior to installation.
Install the two 6AN plugs into the other two ports on the Radium FPR.
At this time, check the orientation of the top cap. The vacuum nipple
should be pointing toward the port with the green fitting installed. If this is
not the case, remove the FPR top cap and clock it to the correct position.
Take care not to disrupt the internal spring and other components.
Reassemble the regulator and tighten down the screws evenly in an
alternating pattern.
6
Oil Lubrication
On the opposite side of the FPR, install the -10AN male adapter into the
top port and the hose barb adapter into the bottom port, as shown.
Tighten these fittings.
19MM Socket
25MM Socket
7
Oil Lubrication
On the inlet (black end) of the fuel filter, install the 10AN ORB to 6AN male
adapter and tighten. Then install the female/female 6AN coupler and 6AN
male to 5/16" SAE quick connect adapter, as shown. Tighten all fittings.
25MM Socket
9/18" Wrench
5/8" Wrench
8
Oi Lubrication
Apply Teflon paste to the fuel pressure gauge threads and screw it into the
inline 1/8” NPT adapter fitting. Tighten finger tight, then add another 1.5
to 3 turns with a wrench.
Install the included O-ring to the male portion of the inline adapter.
Lubricate the O-ring and install to the fuel filter “OUTLET” port.
Adjoin the 2 assemblies by securing the 10AN male and 10AN female
fittings.
PTFE Teflon Paste
1" Wrench
9
Scissors
Remove the rubber sleeve from the OEM fuel filter and make a single cut
down it's length as shown.
10
Slide the filter sleeve over the Radium fuel filter.
12
10MM Socket
Install the fuel filter/FPR assembly in to the factory clamp as shown.
Check the orientation of the pressure gauge and FPR and adjust them if
necessary by loosening the fitting installed in step 8.
When clocking is complete, tighten the nut for the mounting bracket.
13
Connect the fuel feed line to the fuel filter outlet. Push until a "click" is felt.
Confirm the OEM vacuum hose will reach the FPR vacuum port. NOTE:
fuel pressure is typically adjusted at atmospheric pressure so this vacuum
line can be temporarily removed.
14
Connect the fuel feed line to the inlet of the filter as shown. Push until a
"click" is felt.
15
Screwdriver
Hook up the fuel return line to the FPR hose barb fitting, as shown. Re-use
the factory hose clamp. The hose can be cut shorter for best fit. Ensure all
connections are tight.
NOTE: The FPR is not pre-set to any particular pressure.
Turn on the fuel pump and check for leaks. If no leaks are present, proceed
to the next step for fuel pressure calibrating.
Hose cutter
16
3/32" Allen Wrench
With the pump running, and no vacuum connection to the FPR, turn the
set screw until the desired fuel pressure is achieved while referencing the
gauge. For reference, the stock BMW fuel system operates at 5bar (72.5
psi).
Once adjustment is complete, tighten down the lock nut for the
adjustment screw. Install the metal cover as shown. Some trimming in the
area of the pressure gauge will be required. Alternatively, the pressure
gauge can be removed and a 1/8" NPT plug installed (not included).
3/8" Wrench
10mm Socket

17
Adjustable Wrench
P/N: 20-0429 INSTALLATION
Use a vice to hold the factory pressure regulator and a wrench to remove
the filter from the regulator.
With the regulator removed, install the provided 6AN to metric thread
adapter into the regulator, as shown. Use the included crush washer to
create the necessary seal.
18
Oil Lubrication
On the inlet (black) end of the fuel filter, install the 10AN ORB to 6AN male
adapter and tighten. Then install the female/female 6AN coupler and 6AN
male to 5/16" SAE quick connect adapter, as shown. Tighten all fittings.
Apply oil to all o-rings.
25MM Socket
9/18" Wrench
5/8" Wrench
19
9/18" Wrench
On the outlet (green) end of the filter, install the other 10AN ORB to 6AN
male adapter. Next, install the other female/female 6AN coupler. Make
sure to use oil on all fitting o-rings.
Now screw the female/female coupler to the fitting that was installed in
the regulator in step 17 and tighten.
5/8" Wrench
20
Scissors
Remove the rubber sleeve from the OEM fuel filter and make a single cut
down the length of the sleeve, as shown.
21
10mm Socket
Slide the sleeve over the Radium filter body.
Insert the fuel filter inlet SAE quick connect fitting into the fuel feed hose
coming from the rear of the vehicle.
Position the filter/regulator assembly into place and secure with the OEM
filter bracket and nut.
Insert the SAE quick connect hose fitting from the fuel rail to the regulator
outlet.
22
Flat head screwdriver
Attach the return hose to the OEM regulator return fitting, as shown. Some
trimming of the hose may be necessary. Secure with the OEM hose clamp.
Connect the vacuum reference line to the regulator.
To prime the system, cycle the key a few times and check for leaks.
Address any leaks that are found and then re-test.
Reinstall the shield over the filter assembly.
INSTALLATION COMPLETE
Hose Cutter
